A Simple Trick for Copying Textures between Photos
Hey, have you ever wondered if you can get really creative and manipulate reality using your digital photography skills?
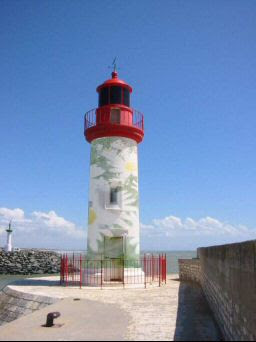
Well, I recently took a shot of a lighthouse and thought it might be interesting to paint some kind of special texture on it.
The resulting photo was awesome, as you can see below. See how those flowers appear on the lighthouse wall? Curious how this was done? Well, read on and find out!
 The result of copying a texture from one photo to another
Step 1: Selecting The Canvas
Before we start, you may want to download the tutorial pictures. There are two of them, one is the original lighthouse photo and the other is a photo of some wild flowers.
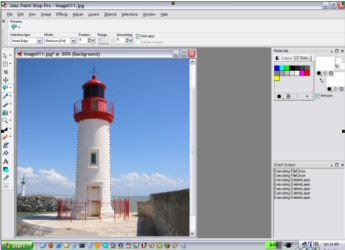
Now, once you have the photos, the first thing to do is to load up your trusty image editor. For this tutorial, I'll use Paint Shop Pro. Open the photo of the lighthouse and select the Freehand Selection tool, which we will use to ensure that any painting is only done on the wall of the lighthouse.
Locate the Freehand Selection tool in the fifth cubby of the toolbar on the left side of the screen. Make sure you can see the Tool Options palette at the top of the screen; you can toggle it on by choosing View, Palettes, Tool Options. Then set the Freehand Selection tool to Smart Edge from the Selection Type drop-down menu.

Selecting the canvas onto the which the texture will be painted
Select the entire wall area with the tool. To do that, click on the edge of the hood, move the cursor a short distance, then click again. Follow this process until it's completely selected, then double-click to close the loop.
Step 2: Add the Texture
Now select the picture of wild flowers and switch to the Clone Brush. This useful tool resides in the eighth cubby from the top of the toolbar. In the Tool Options palette, set the size of the brush to about 45 pixels and make the Opacity pretty low, about 30 percent. The opacity should be set low so that we can still see the underlying texture of the wall in the resulting photo.
Step 3: Start Painting
Right, now you can start to paint the lighthouse photo. Right-click on the wild flowers to select your starting point. Now switch to the lighthouse photo and position the mouse at the point that you'd like the flowers to appear. When you're ready, just click and paint, covering the entire wall in one stroke.
When you're done, click on the Freehand Selection Tool again and right-click in the picture to eliminate the selection outline. If you like the results, save the picture.
Conclusion
Ok, we're all done for this short tutorial. I hope you've learnt some tips on applying textures to photos. One way to get different results is to try varying the opacity of the painting. You can also use a larger or smaller photo for the texture to get different effects. |


0 comments:
Post a Comment